
Generate images in n8n with GPT Image 2 (free webhook template)
If you build in n8n, you probably want image generation as a clean building block: something you can call from anywhere, that returns an image and nothing else. That is exactly what this template is. Three nodes, one webhook, one key.
Grab the free template, and here is how to set it up and use it.
1. Import the template
Open the template page and download the JSON. In n8n, create a new workflow and use Import from File (or paste the JSON). The three nodes and their wiring come in ready.
2. Add your ApexApi credential
Open the Generate image node and pick your ApexApi credential (or create one with your ak- key from apexapi.dev/keys). The model is already set to openai/gpt-image-2. That is the only setup step.
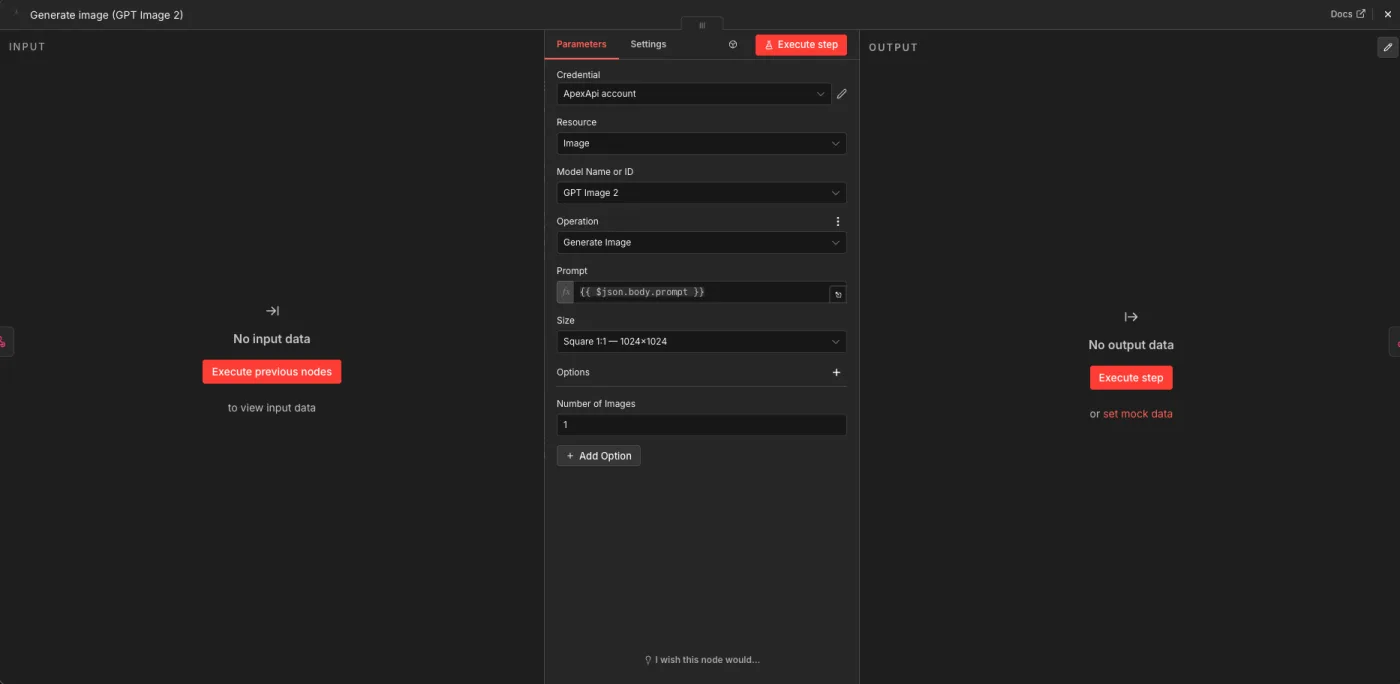
3. How it works: three nodes
The whole workflow is a straight line:
- Webhook: POST a prompt receives a request. It is set to
responseMode: responseNode, so the workflow answers on the same call. - Generate image (GPT Image 2) takes the prompt from the request body (
{{ $json.body.prompt }}) and calls GPT Image 2 through ApexApi. - Respond with the image sends the result back to the caller.
That is it. A prompt goes in, an image comes back. No queues, no polling, no second service.
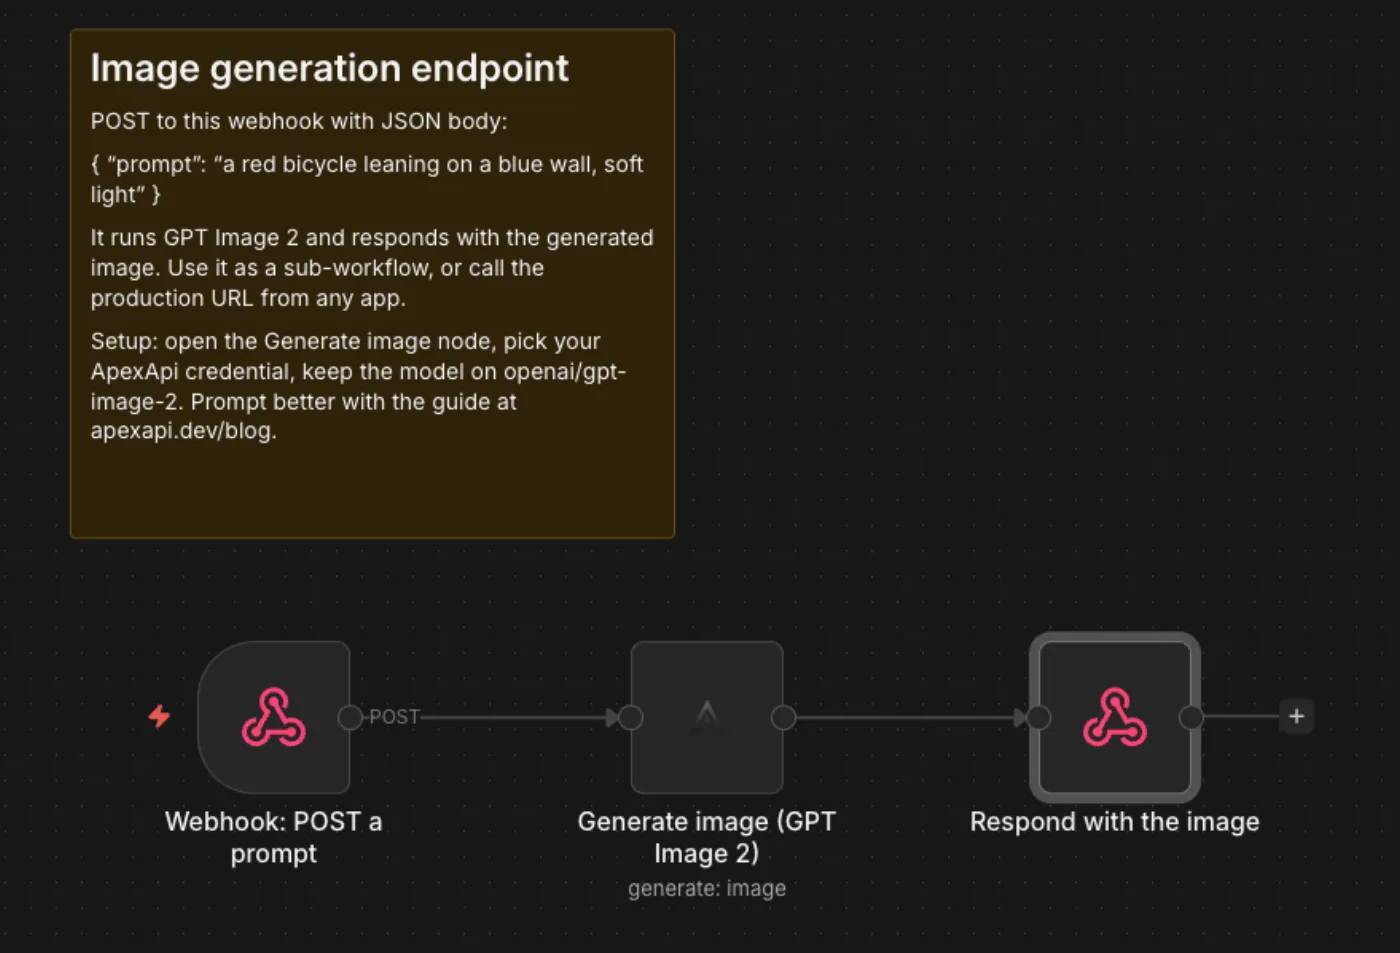
4. Call it
Activate the workflow, then POST a prompt to the webhook URL. During editing use the test URL; once active, use the production URL n8n gives you.
curl -X POST https://YOUR-N8N-HOST/webhook/generate-image \
  -H "Content-Type: application/json" \
  -d '{"prompt": "a red bicycle leaning on a blue wall, soft morning light"}'
The response contains the generated image. Point your app, your bot, or another tool at that URL and you have image generation on tap.
5. Use it as a sub-workflow
Because it is a webhook, it is reusable by design. Inside a bigger automation, call it as a step (an Execute Workflow node, or just an HTTP request to its URL) whenever you need an image, and keep the generation logic in one place. Change the model or defaults once, and every caller gets the update.
6. Swap the model, and prompt it well
Want a different look? Change the model field on the Generate image node to any image model in the catalog. And since the prompt does most of the work, the GPT Image 2 prompting guide has five techniques (including the text-rendering trick) that make the output noticeably better.
Where to go next
- Get the template: download and import.
- GPT Image 2 API: live pricing and specs.
- Build AI workflows in n8n: install the node and the other templates.
- ApexApi MCP: the same, from Claude Code instead of n8n.
Three nodes, and every workflow you own can make images.
Frequently asked questions
- How do I import the template?
- Download the JSON from the template page, then in n8n open a new workflow, use Import from File (or paste), and select it. All three nodes and their connections come in ready to run.
- How do I call it as a sub-workflow?
- It is a webhook endpoint, so any workflow or app can POST to it. Inside n8n you can also add an Execute Workflow node that calls it, which keeps image generation as one reusable block.
- Can I use a different image model?
- Yes. Open the Generate image node and change the model field to any image model in the catalog, for example black-forest-labs/flux-2-pro. Nothing else changes.
- What does it cost?
- You pay per image, billed to your ApexApi credit balance. GPT Image 2 pricing scales with size and quality; see the model page for live rates.
Recommended
More posts
- GPT Image 2.5 is live on ApexApi: Sunburst and Flare, five quality levels, one key
OpenAI's GPT Image 2.5 models are in the ApexApi catalog as openai/gpt-image-2.5-flare and openai/gpt-image-2.5-sunburst. Two new quality levels, sharper edits, and prices from $0.0071 per image all-in. Here's what changed, what each level costs, and which model to pick.
- How an AI agent funds and pays for its own API calls
Registration, balance and top-up as three HTTP calls instead of three web forms. The flow, the caps that keep it safe, and when a human is still required.
- Scrape, crawl and extract on the same key as your models
Three web context endpoints on the balance that already pays for inference. What each one costs, when to reach for which, and what you stop maintaining.
One API key for every AI model
Start free